AWS Hosted Pelican Site 1
Posted on Mon 26 June 2023 in AWS host Pelican
There's plenty of tutorials describing how to set up a dev blog using Pelican, a static site generator, so we're not going to waste time re-creating the wheel here, but I will share the process I followed to set up this pelican site in AWS. In this section, we're going to walk-through the basics of setting up the static site on S3 and routing traffic to that static site with a domain we're going to register with Route 53. We're also going to secure our site with AWS Certificate Manager, and improve latency with CloudFront. In the next section, we're going to set up a complete CI/CD pipeline to auto generate our site from source, all encapsulated within the AWS ecosystem.
Architecture
The high-level architecture to host our Pelican site is illustrated in the diagram below:

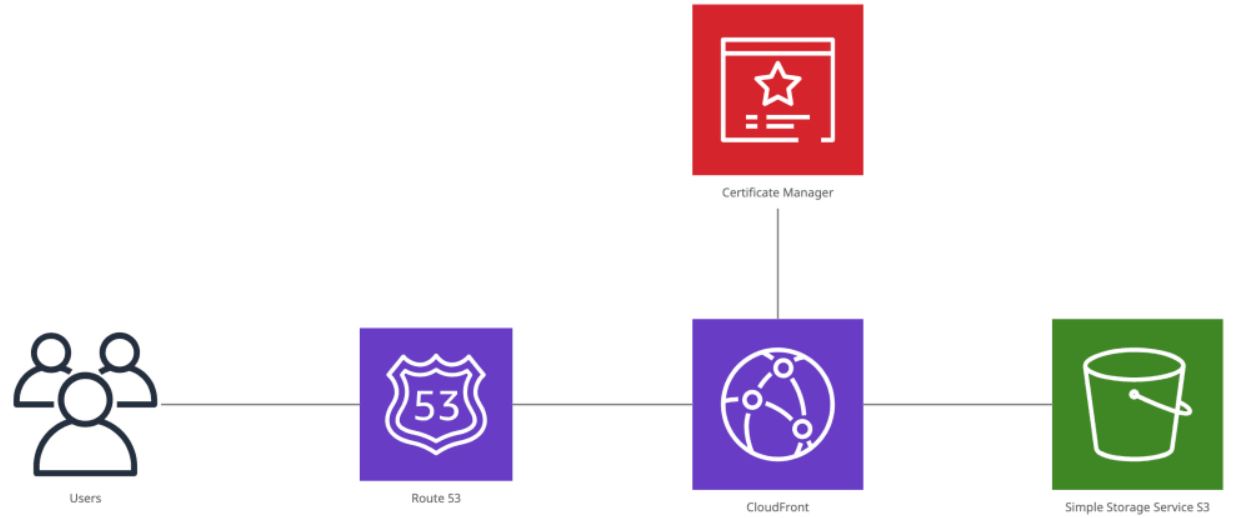
Register A Domain With Route 53
First step is to simpley register a domain name in Route 53. Our domain name is a downstream dependencies for:
- S3 bucket
- AWS Certificate Manager
- CloudFront Distribution
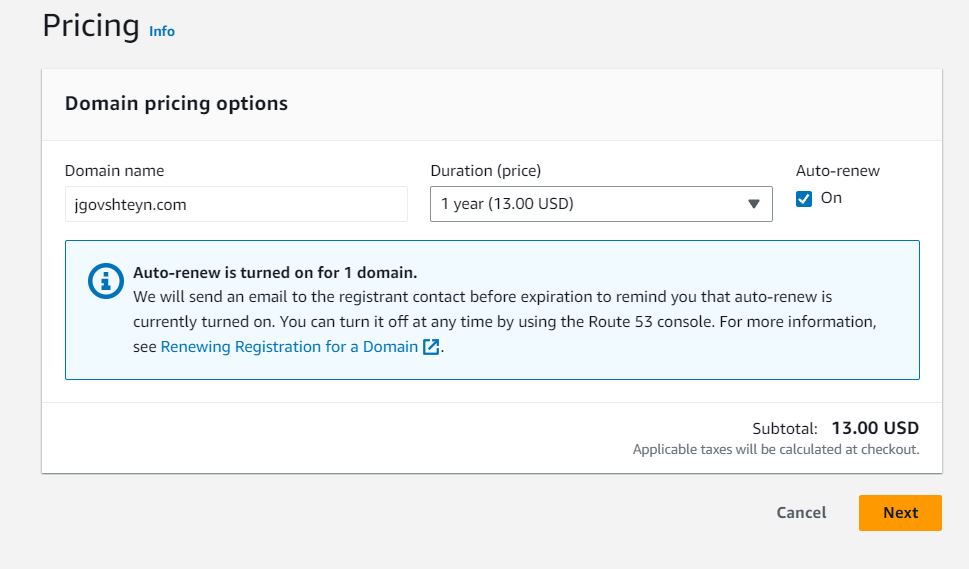
We'll return to Route 53 later to set up domain zones.
Create A Certificate With AWS Certificate Manager
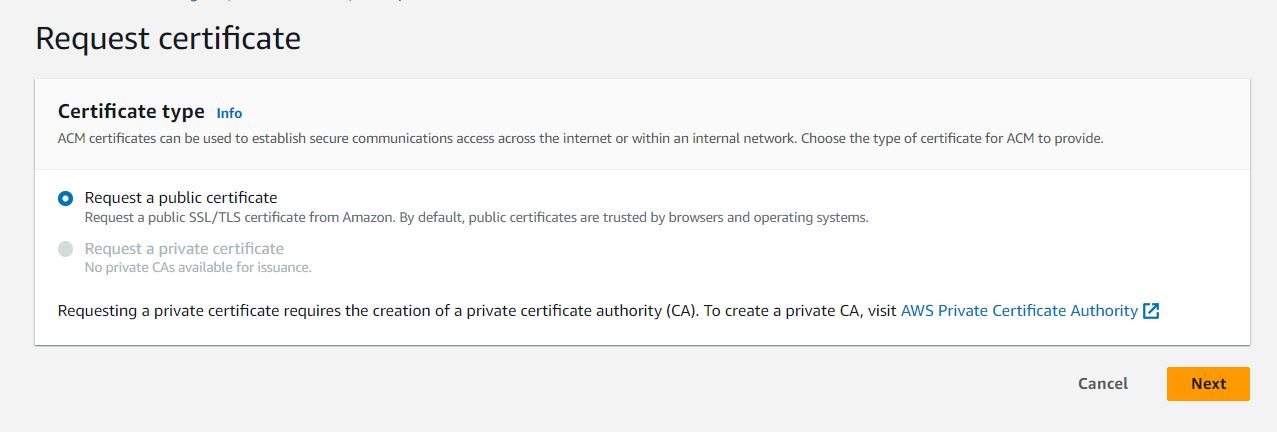
A secure connection is preferred for page rank, and overall, appears more professional. Before we can route traffic to our site over https, we need to request a public certificate from AWS Certificate Manager.
When requesting a new certificate from ACM, sure to select Request a public certificate.
When you request a certificate, ACM first asks for the domain name. On the Request public certificate page, keep all the default setting, and add two Fully qualified domain names:
- Naked domain example.com
- www domain www.example.com
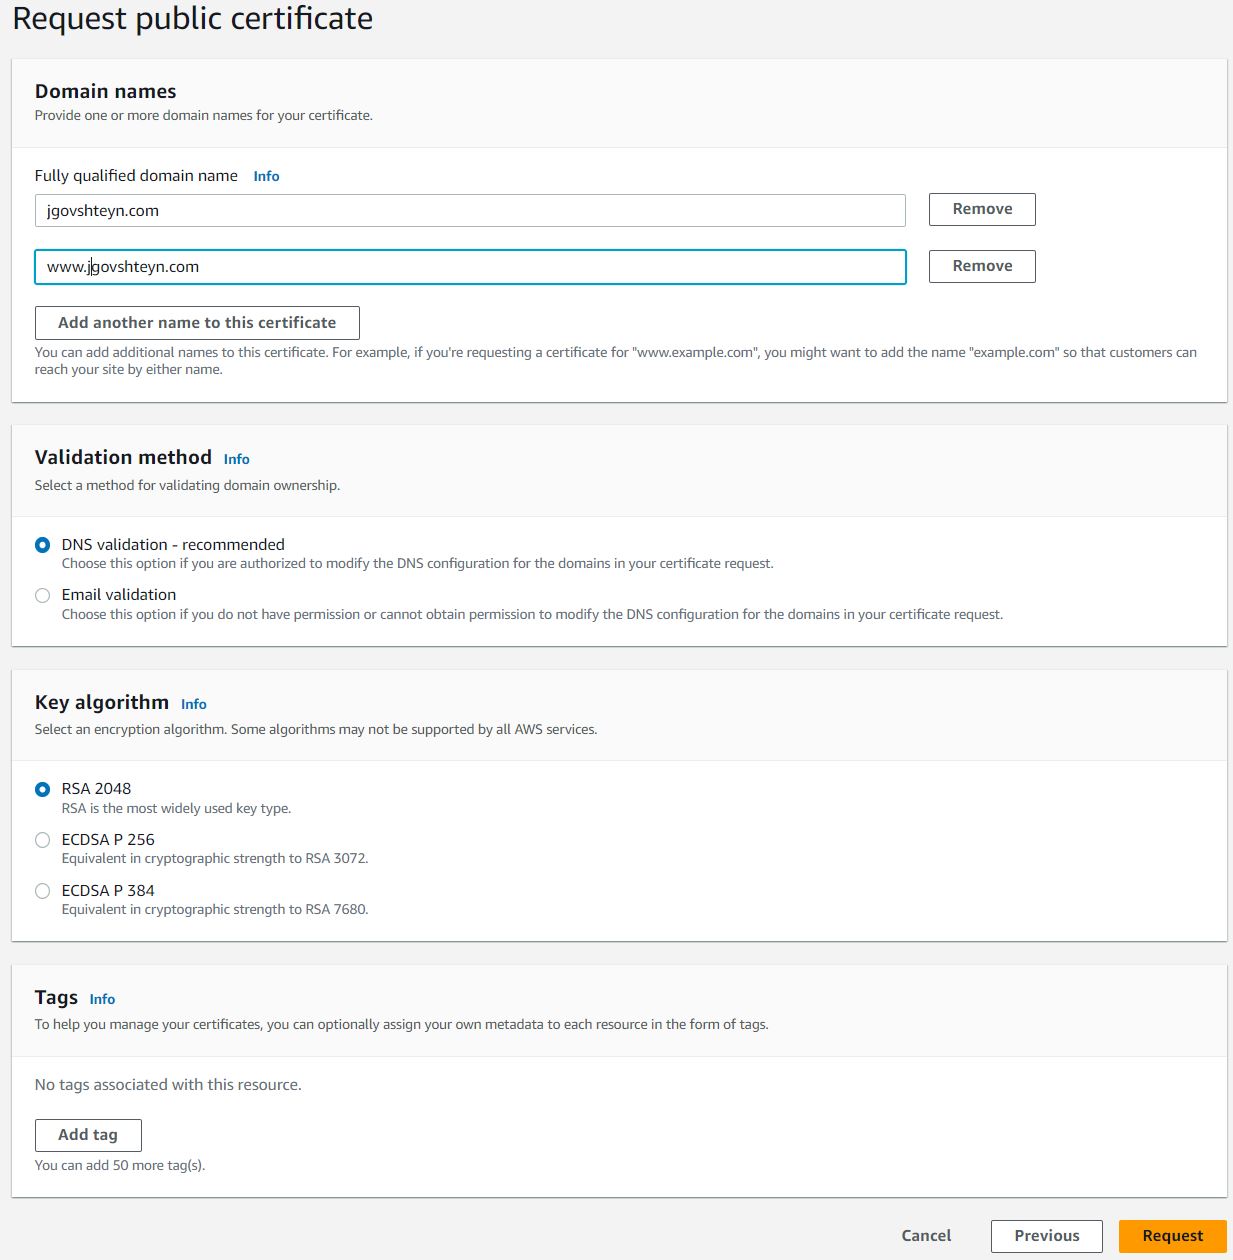
The newly created certificate will be in pending validation status. Choose Create records in Route 53 to let AWS auto-insert the required records to your Route 53 configuration, after which your certificate status should change to Issued.

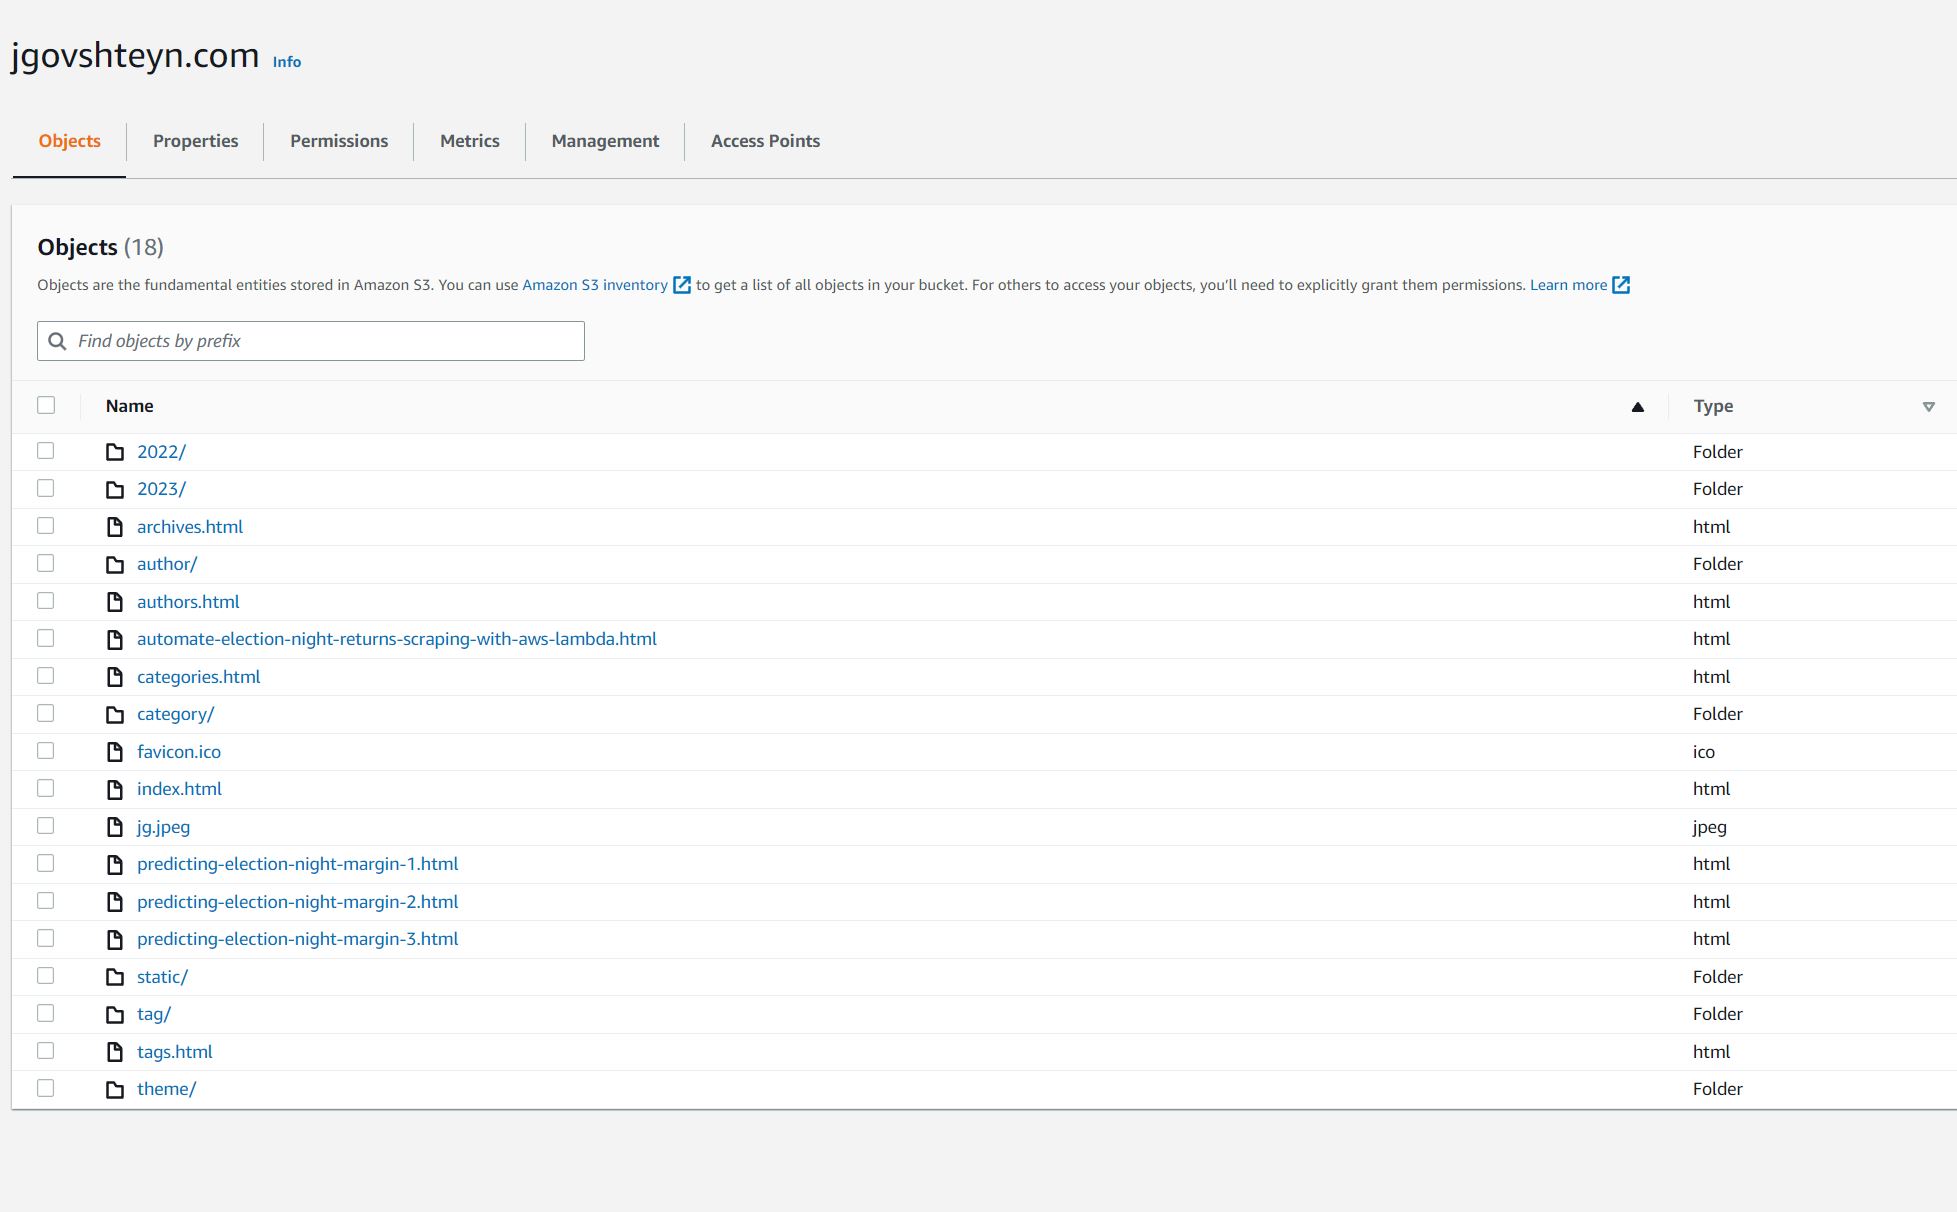
Create S3 Bucket
A key feature of using Pelican is the simplicity that comes with static page generation. S3 makes it simple to host Pelican with it's static website hosting.
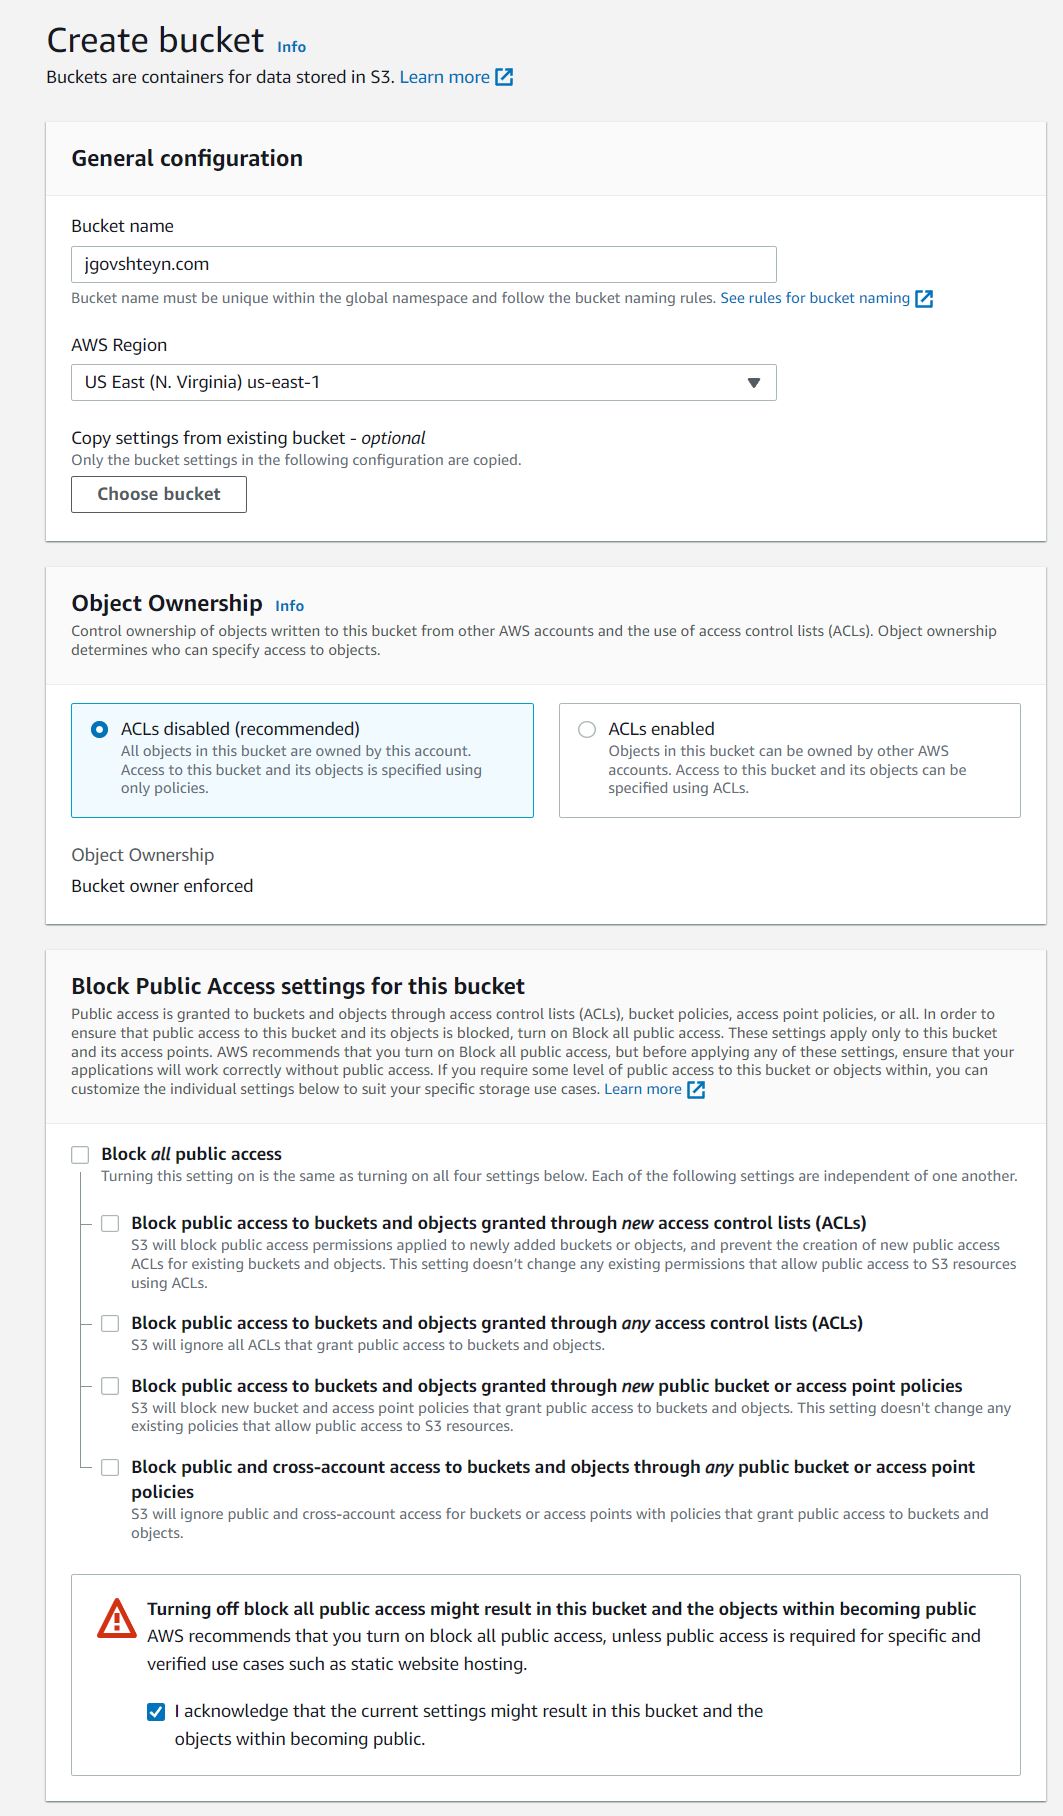
Create an S3 bucket with the same name as the domain you registered. We're going to keep most default setting, except for changing public access. Under the section titled Block Public Access settings for this bucket:
- uncheck Block all public access
- check I acknowledge that the current settings might result in this bucket and the objects within becoming public.
and choose Create bucket
We need to explicitly set a custom bucket policy to allow anonymous access. Under the permissions tab of your newly created bucket, choose edit, in the Bucket policy section.
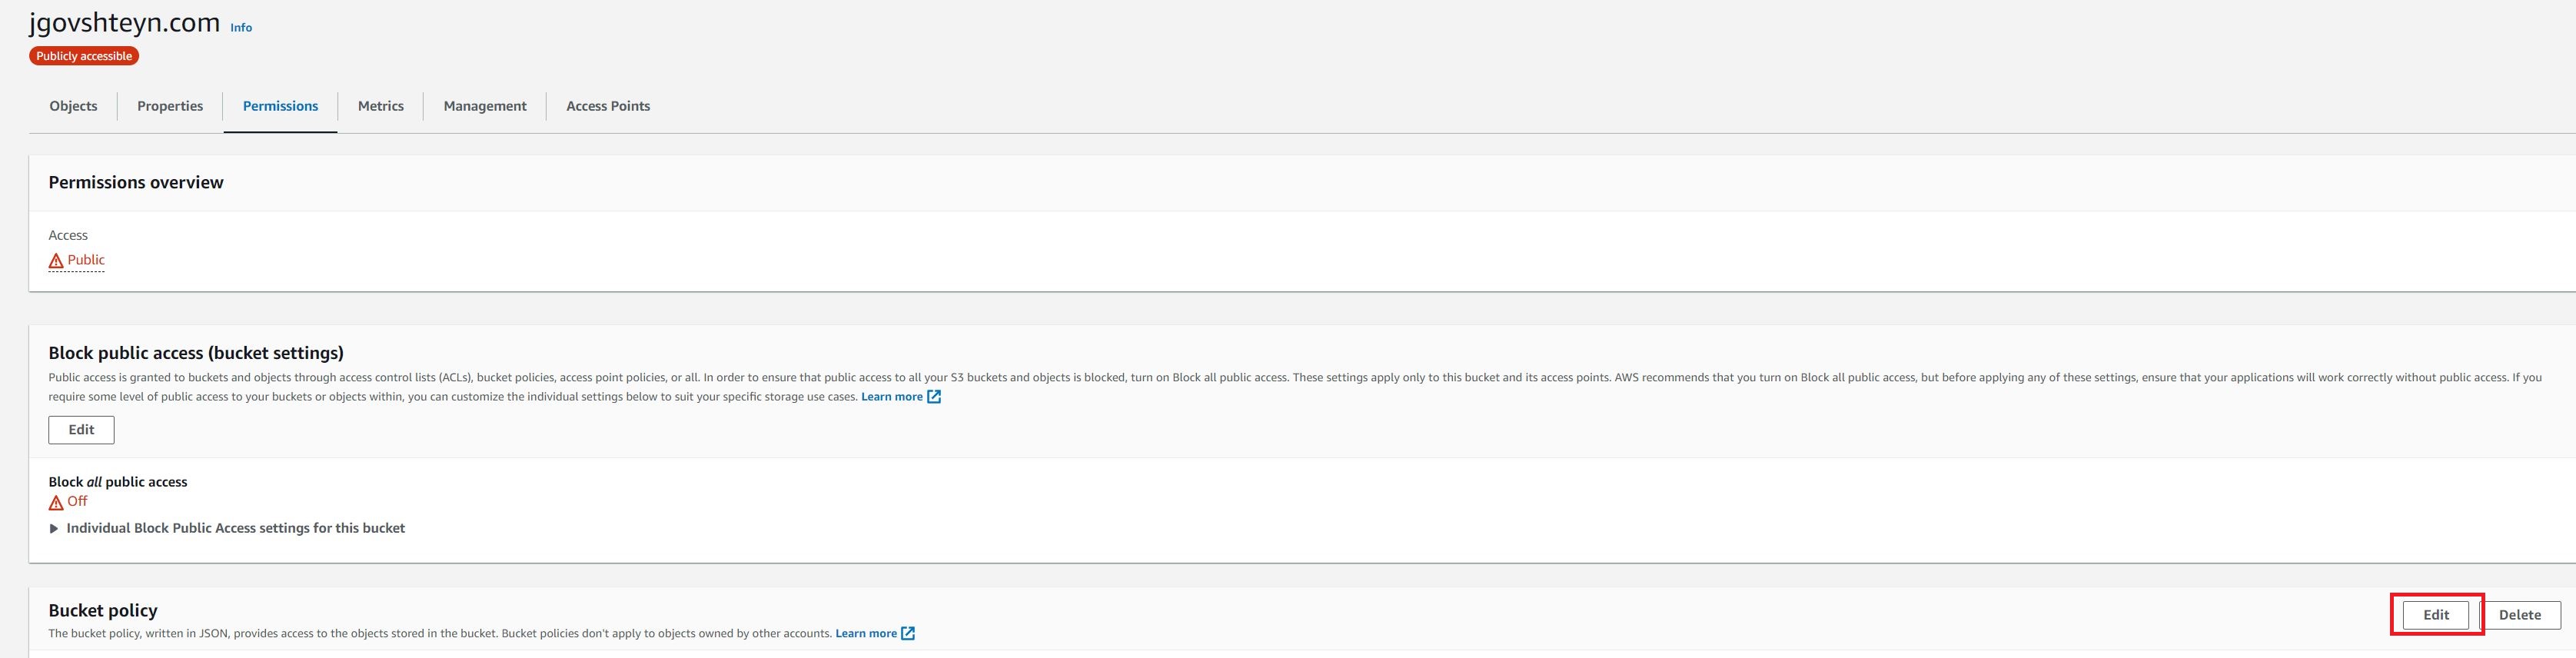
Paste the below under Bucket policy replacing
{
    "Version": "2012-10-17",
    "Statement": [
        {
            "Sid": "PublicReadGetObject",
            "Effect": "Allow",
            "Principal": "*",
            "Action": "s3:GetObject",
             "Resource": "arn:aws:s3:::<S3 bucket name>/*"
        }
    ]
}
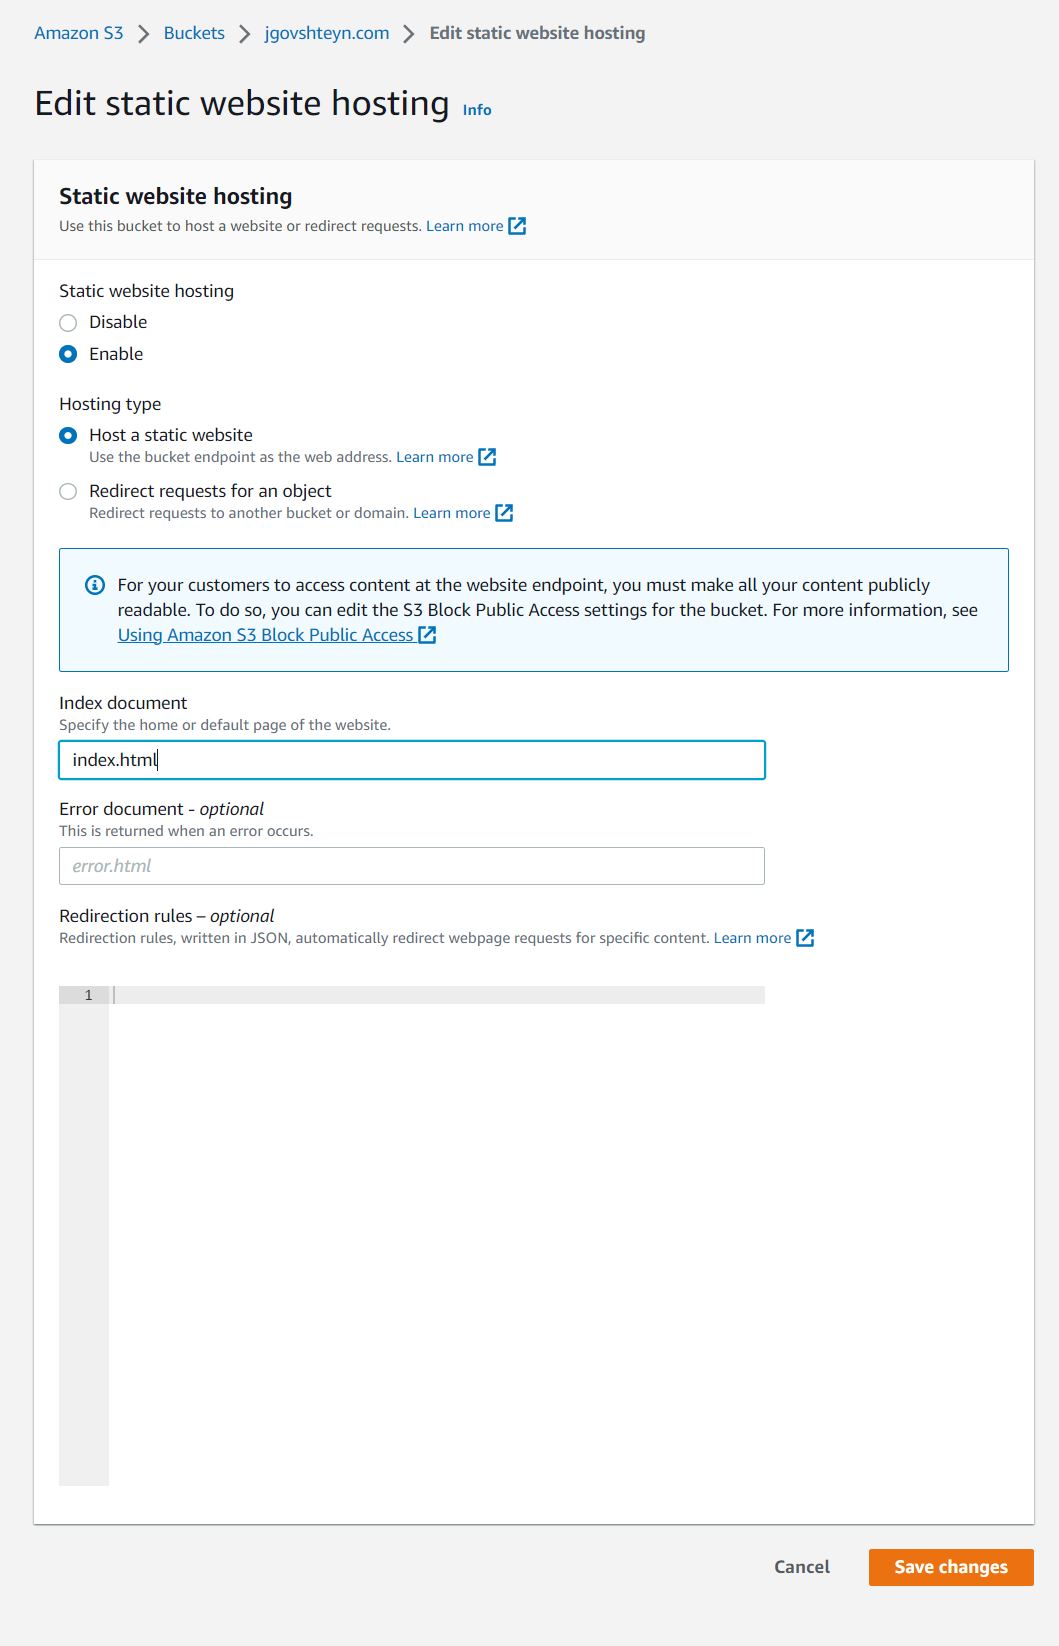
We need to enable static website hosting for the bucket.
On the properties tab, choose edit under Static website hosting

- Choose enable under Static website hosting
- Keep Host a static website under Hosting type
- Add index.html under Index document
and save changes.
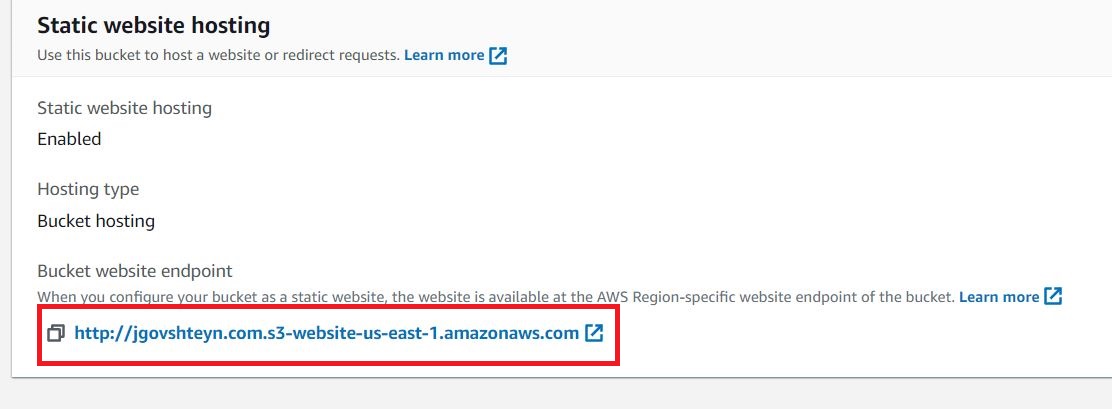
Note the displayed endpoint under Bucket website endpoint.
Finally, upload the output directory of your generated Pelican site. Creating your Pelican site is outside the scope of this walk-through, but Pelican has excellent documentation to help you get started.
Create A CloudFront Distribution
With edge locations and a dedicated network AWS CloudFront makes for faster content delivery and connection.
Navigate to CloudFront in the AWS Console, click Create Distribution. Under the origin section, enter the bucket website endpoint from the S3 static website hosting section above.

In the Default cache behavior section, under Viewer protocol policy. We're going to set that to Redirect HTTP to HTTPS.
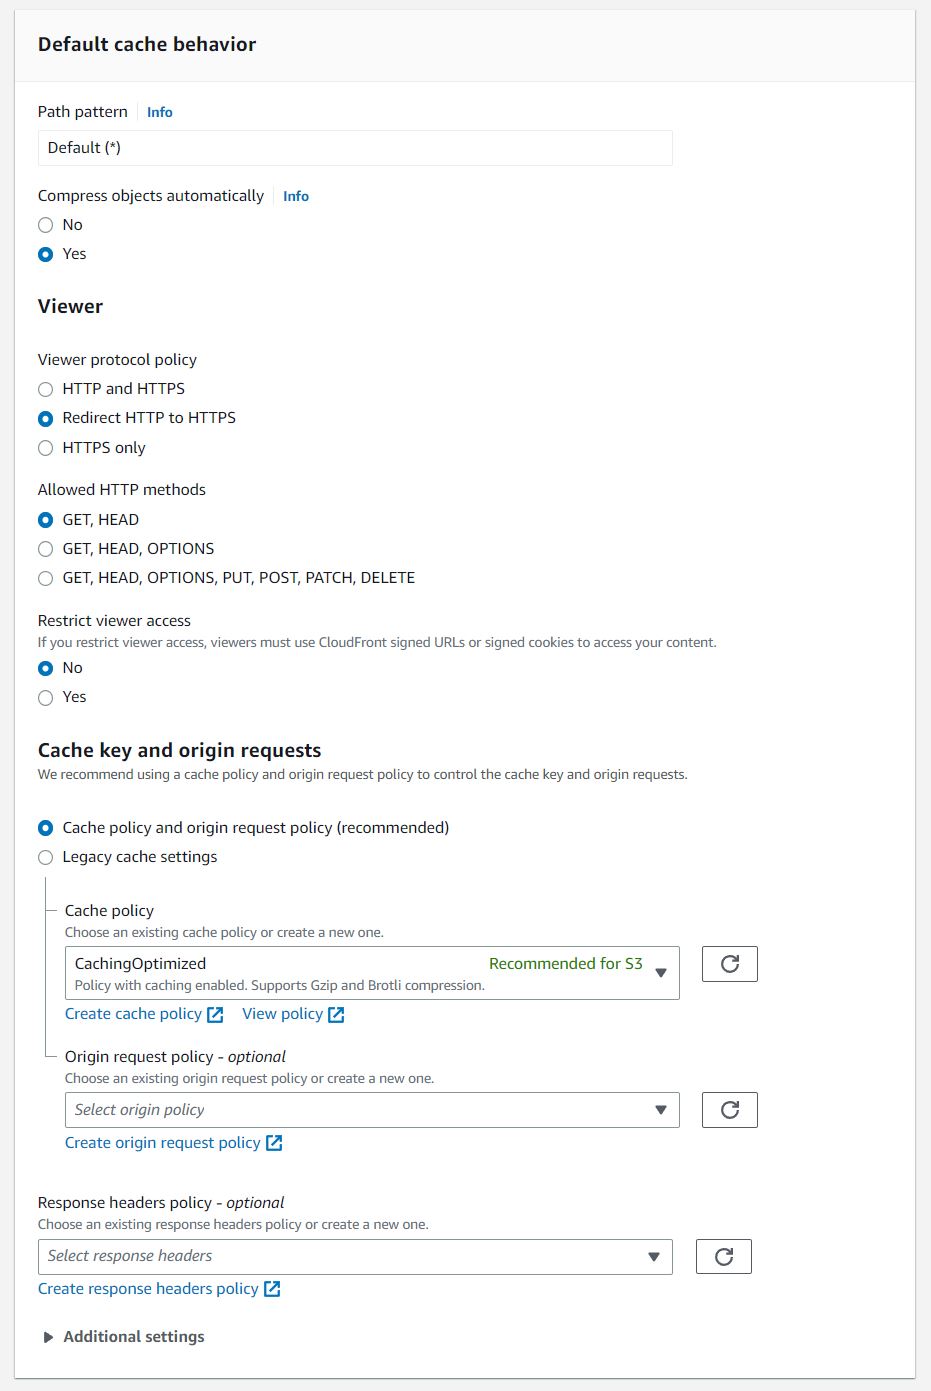
And finally, in the Settings section,
- add the two domains used in our certificate, the Naked domain and the www domain, under the Alternate domain name(CNAME) section.
- add our public SSL certificate created in ACM, under the Custom SSL certificate section.
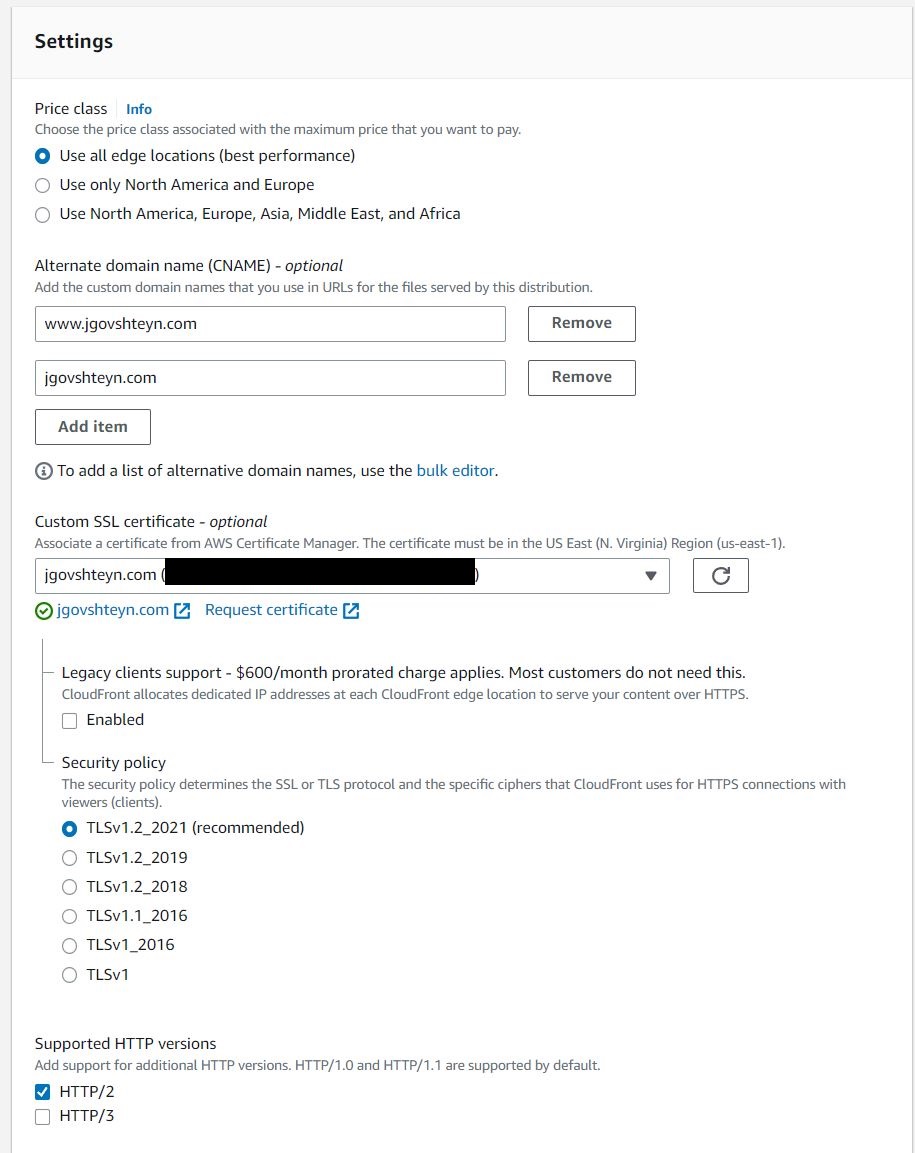
Keep defaults for the rest of the settings.
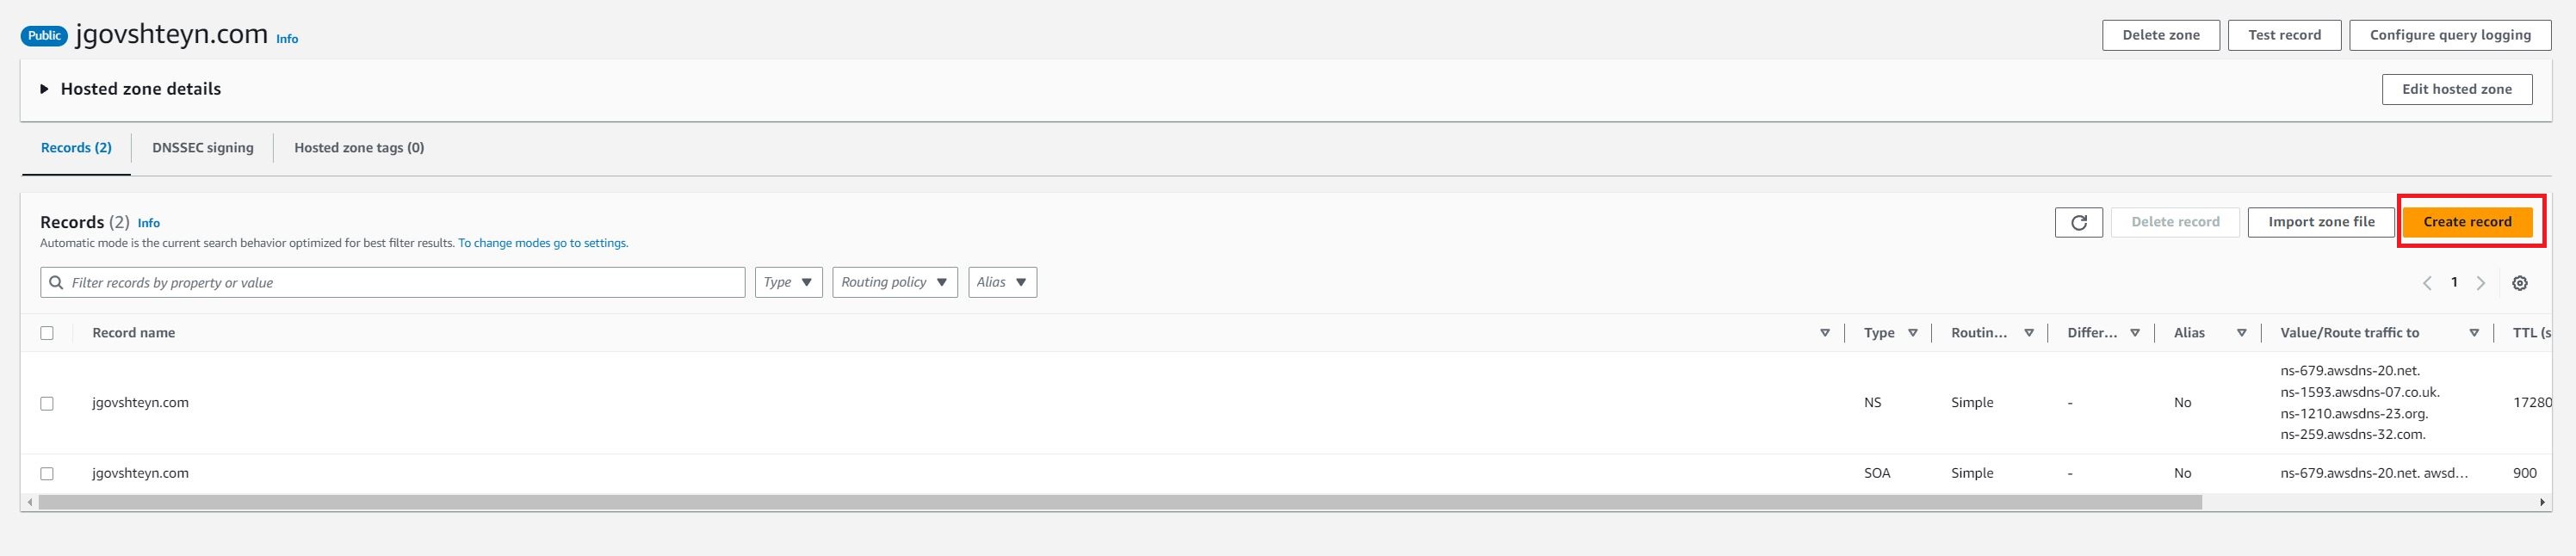
Update The Route 53 Configuration
Update the Route 53 configuration to add an A and AAAA alias record pointing to our cloudFront distribution.
Navigate back to Route 53 and access your domain's Hosted zone, and select Create record.
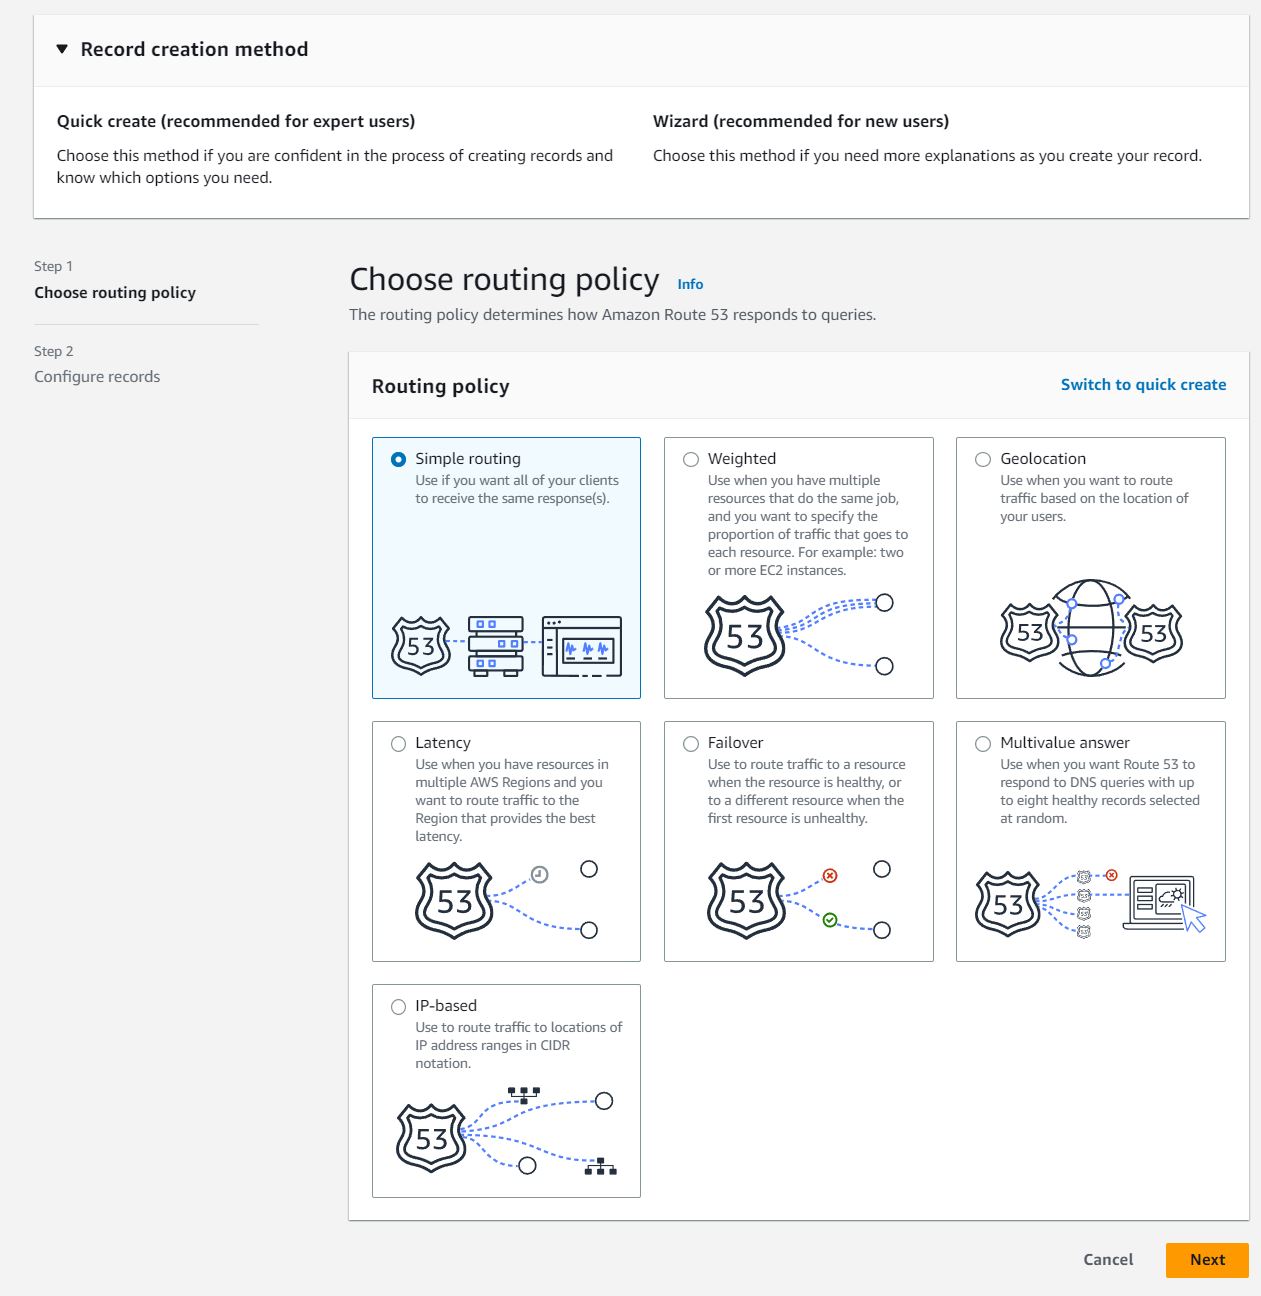
Select Switch to wizard.

Select Simple routing and click next.
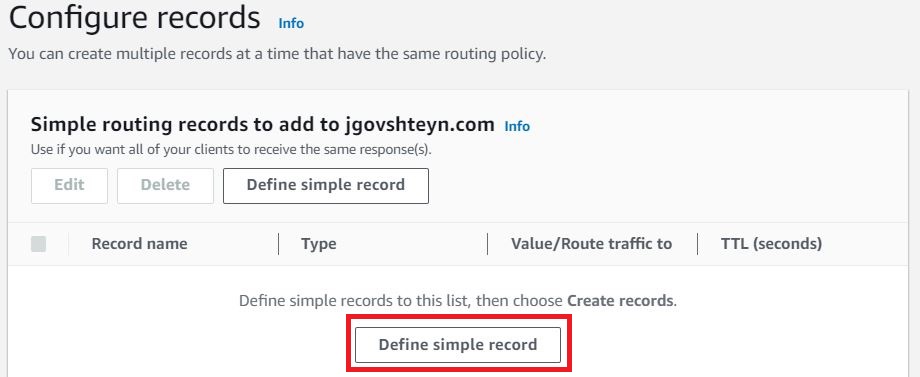
Select Define simple record
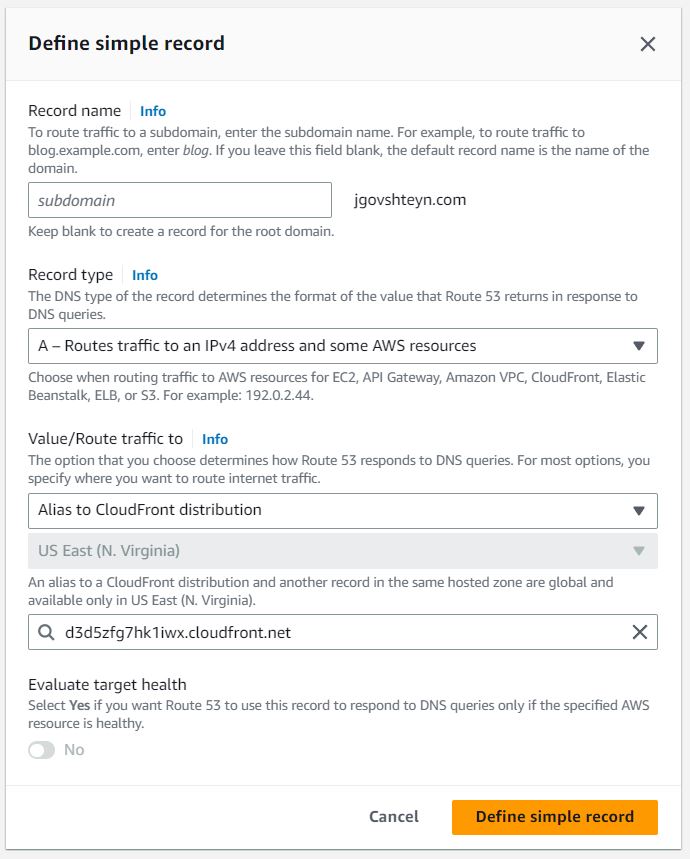
- Under Record type drop down, choose the A record type
- under Value/Route traffic to, choose Alias to CloudFront distribution
- Enter our CloudFront distribution domain name as our target
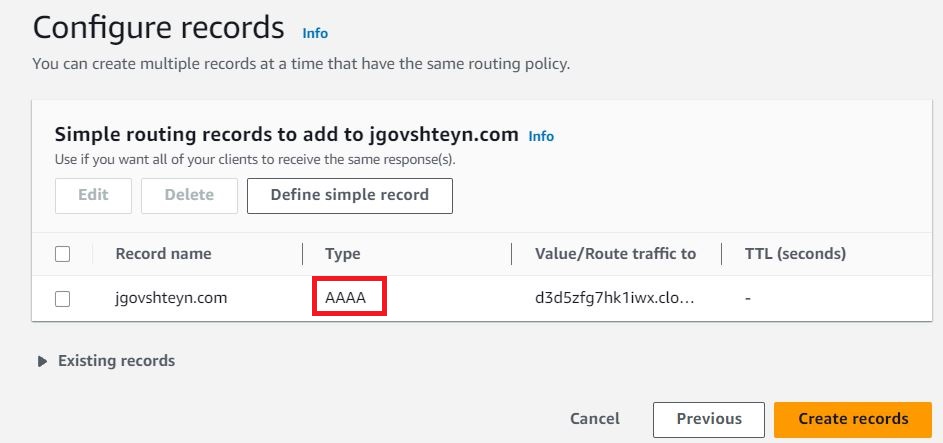
and select Define simple record button.
Repeat the above steps by selecting Define simple record, and create an identical record, except for AAAA as the record type.
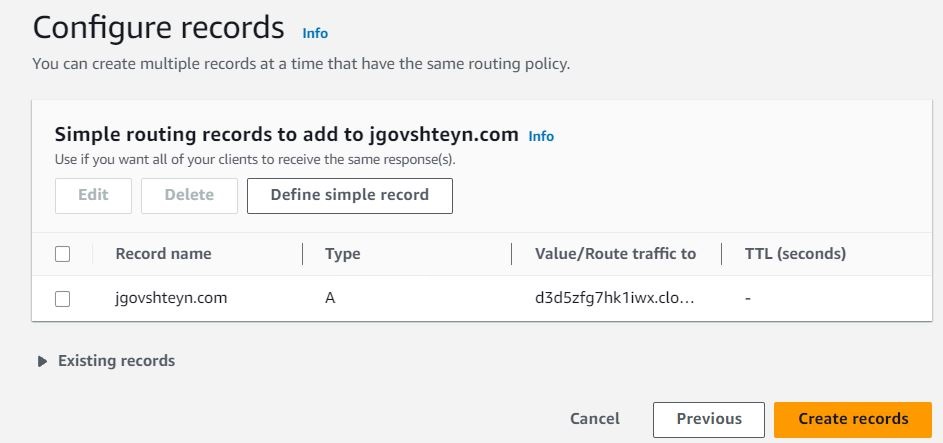
After both the A and AAAA records have been created, select Create records button.
Conclusion
We Should now have a fully operational static website. This section is a prerequisite for the following section, which sets up a CI/CD pipeline to auto generate our site from source.