AWS Hosted Pelican Site 2
Posted on Fri 30 June 2023 in AWS host Pelican
In part 1 we set up and deployed a static website generated with Pelican, a general-purpose framework that enables rapid generation of static websites. Content is written in markdown (.md), and Pelican generates the corresponding HTML, JSON, and CSS files. Now that we have this Pelican site set up and configured, let's create a CI/CD pipeline. In this section, we're going to walk-through the process to set up a continuous integration and continuous delivery (CI/CD) pipeline on AWS to automatically build and deploy our newly created site from source.
Architecture
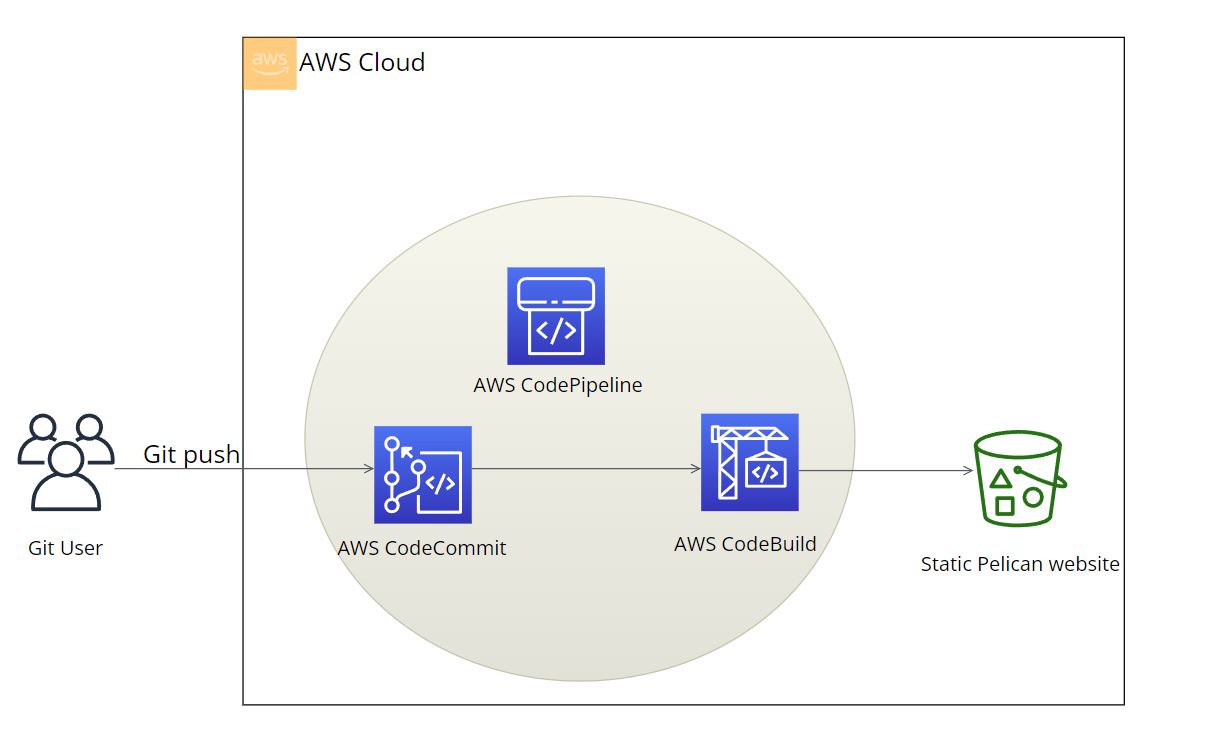
This site is generated from the master branch of an AWS CodeCommit repository, that upon a push:
- A AWS CloudWatch Event triggers AWS CodeBuild to create a build environment
- CodeBuild generates the site as static HTML with pelican
- Pushes the build artifacts to an S3 bucket used to host this site
The above is all automated with AWS Codepipeline, a fully managed continuous delivery pipeline on the AWS Cloud that allows you to automate the publishing of website content to an S3 bucket.
CodeCommit
A Pelican project is composed of a python codebase that generates your site from reStructuredText or Markdown content. This codebase will be version-controlled through a CodeCommit repository, and will be the origin for our CI/CD pipeline. Create a code commit repository to which we'll upload our Pelican project.
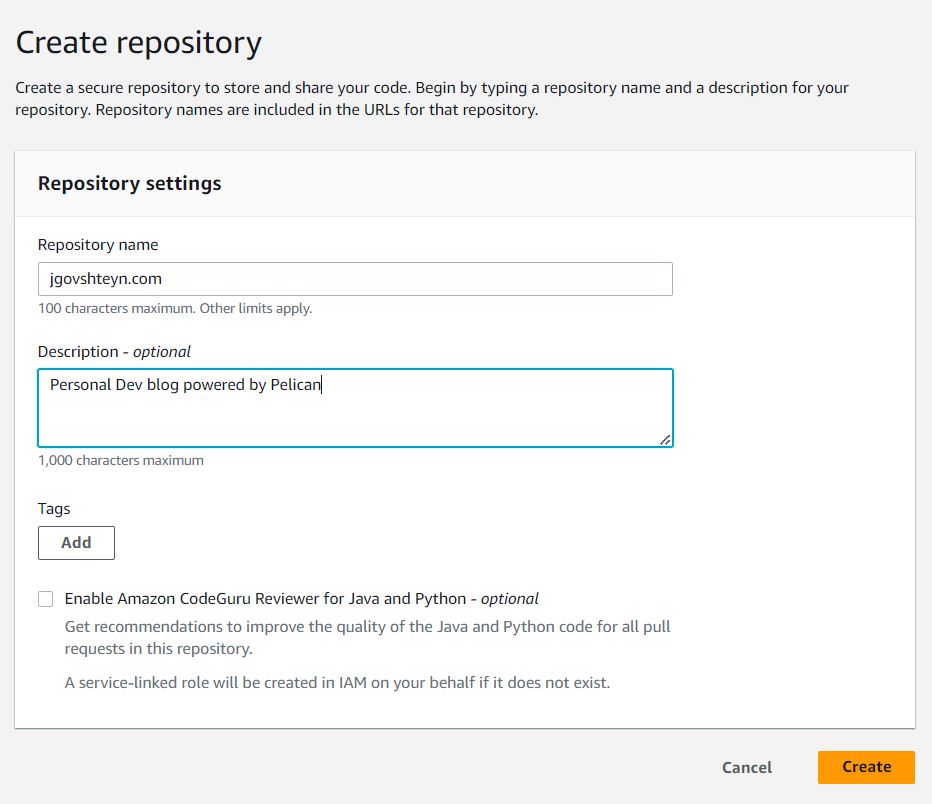
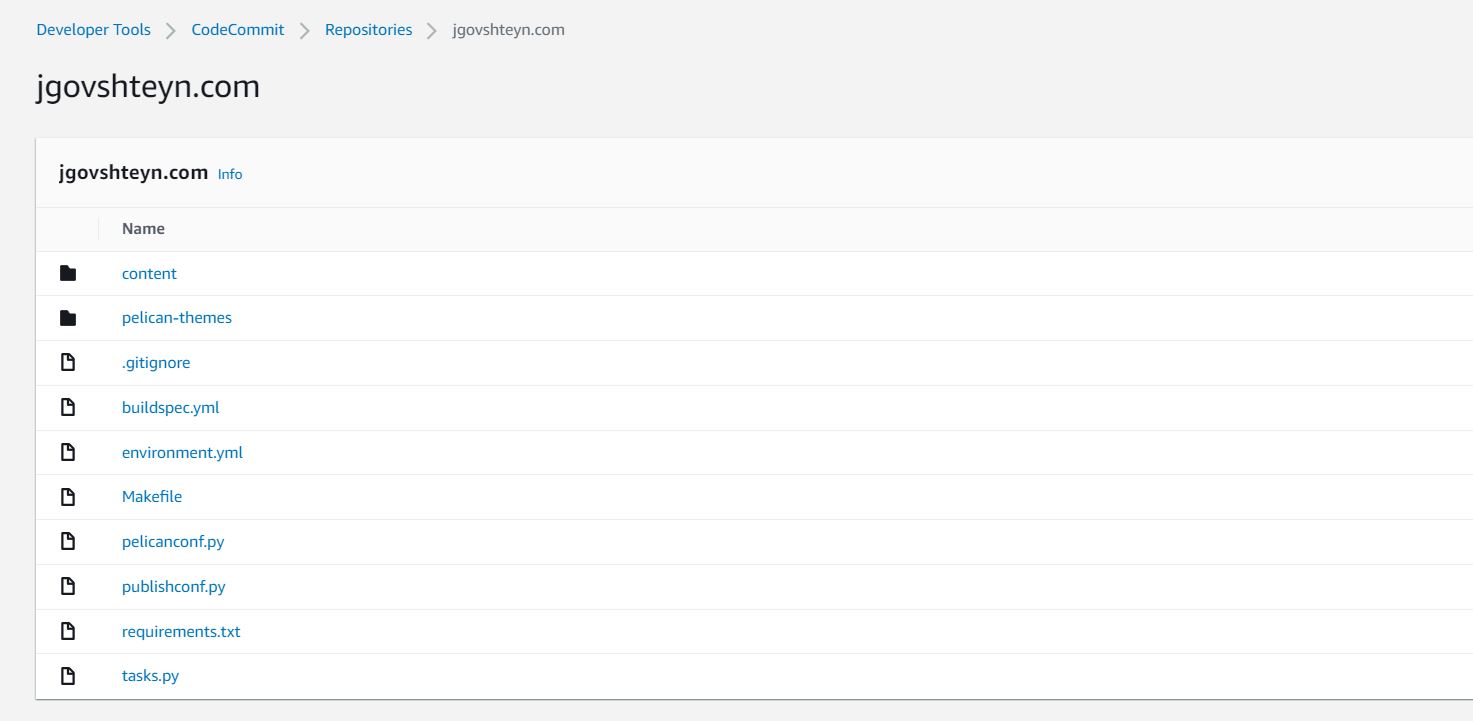
Once created we can upload our Pelican repo
CodeBuild
Using AWS CodeBuild, which has multiple prepackaged build environments, we're going to compile our static site from source.
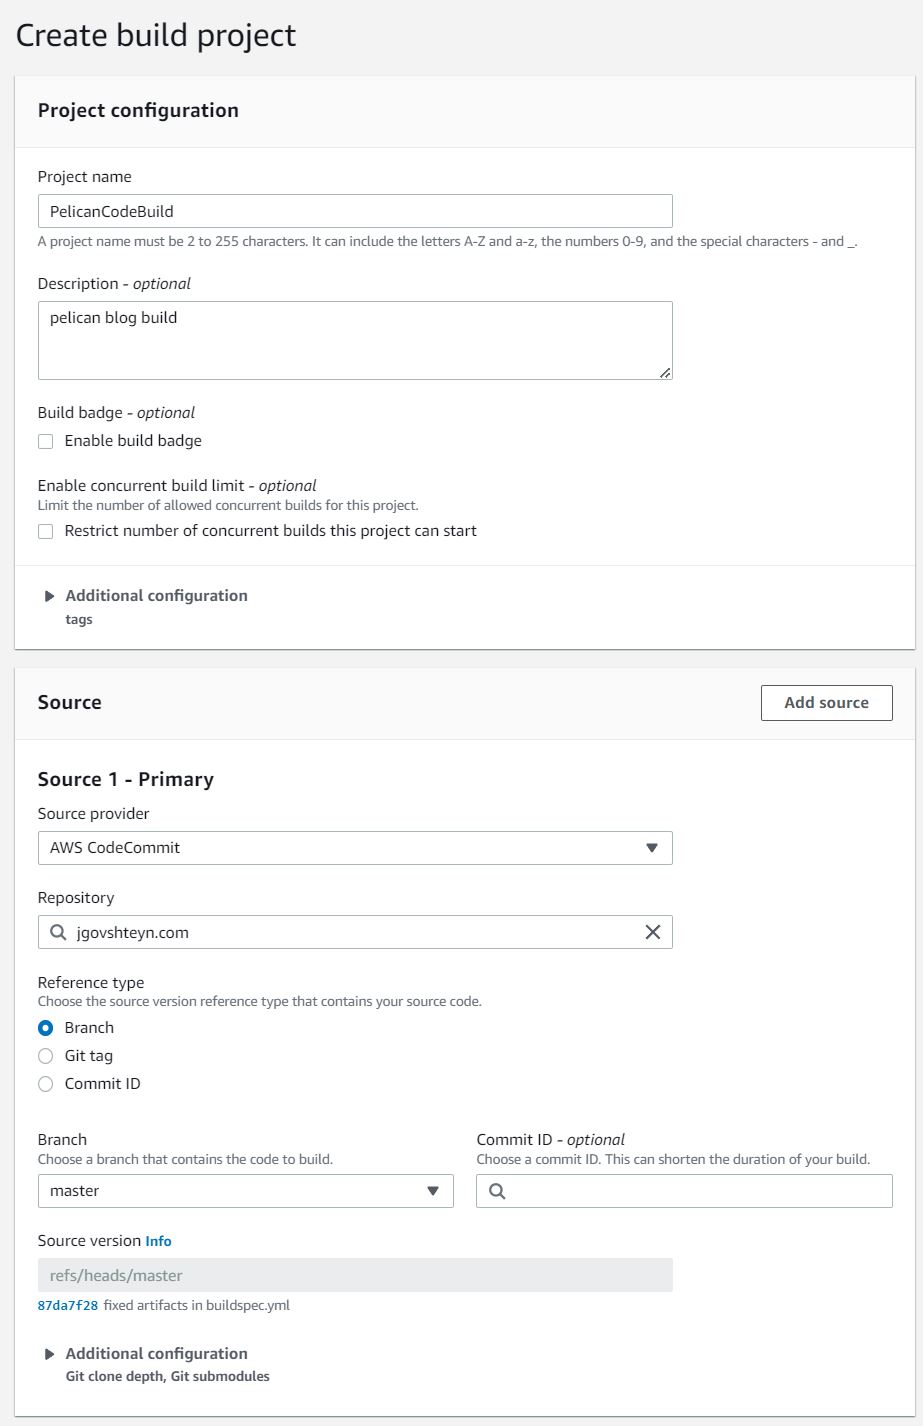
Let's create our Codebuild environment. Under Source:
- Specify AWS CodeCommit as our source
- Choose our repo from the Repository search box
- Select master as our branch
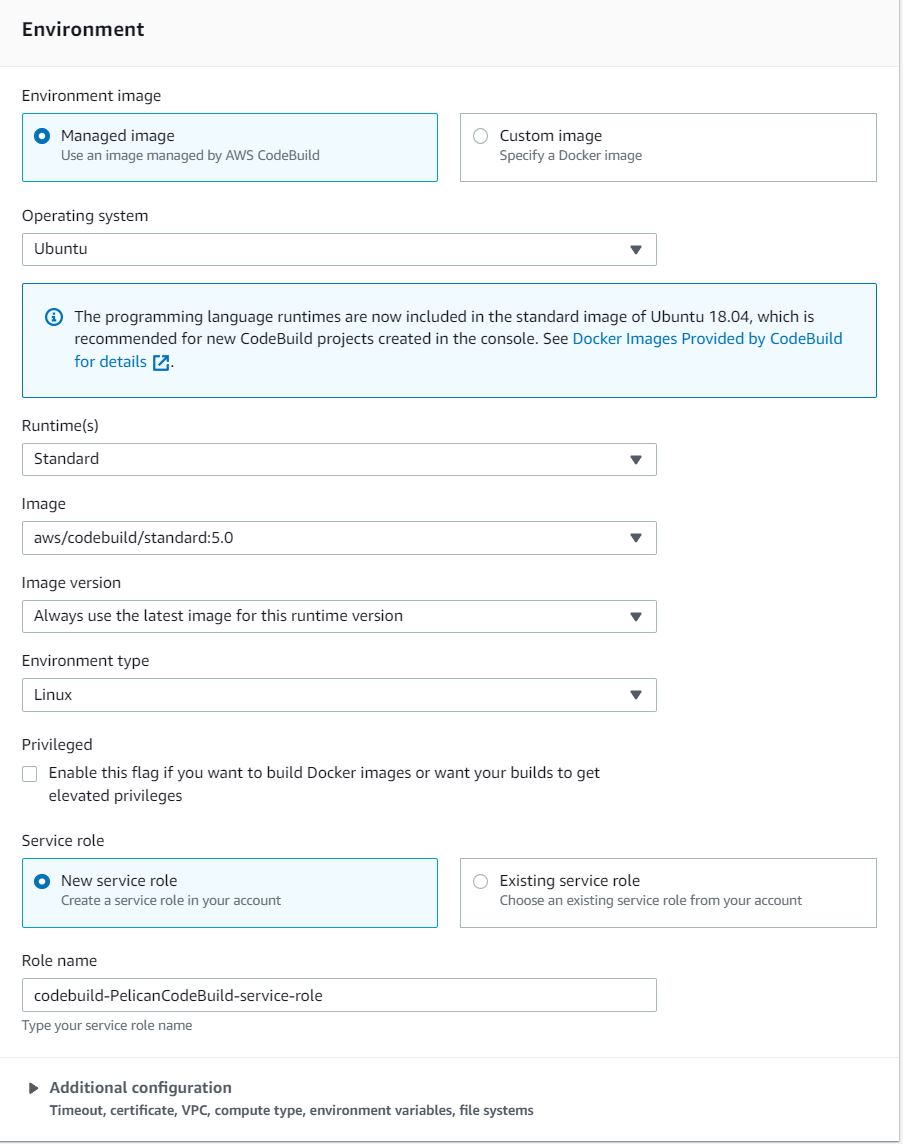
Under Enviornment:
- keep the default Managed image selected under Environemnt image
- choose Ubunut as the Operating system
- Standard as the Runtimes(s)
- aws/codebuild/standard:5.0 as the Image
and keep all other options as default
Codebuild uses buildspec.yml placed at the root our repository. Our vennilla Ubunut build environemnt is configured with a YAML-based collection of build commands and related settings.
version: 0.2

phases:
  install:
    runtime-versions:
      python: 3.9
    commands:
      - echo "Entered the install phase..."
      - python -m pip install --upgrade pip
      - pip install --upgrade --upgrade-strategy only-if-needed -r requirements.txt
  build:
    commands:
      - echo "Entered the build phase..."
      - echo "Build started on **date**"
      - pelican content
artifacts:
  files:
    - '**/*'
  base-directory: output
cache:
  paths:
    - '/root/.cache/pip/**/*'
The following are the two phases we defined in buildspec.yml to configure and compile our Pelican repository with CodeBuild.
- Install: Instructs CodeBuild to use a runtime environment with Python 3.9 and installs all python packages necessary for a Pelican environment
- Build: Provides commands to create static websites for your Pelican project. In this case, the command is pelican content, which creates a directory in the current working directory for storing all the generated output.
After CodeBuild finishes executing the two phases, it creates an output package that will be deployed to our static S3 bucket-hosted website.
CodePipeline
CodePipeline is the AWS CI/CD tool that we'll use to orchestrate all the parts we created above into a continuous workflow from start to finnish. From the initial git push we use to update our Pelican repository, all the way to publishing our generated static website to S3, CodePipeline is a visual tool we'll be setting up to control the flow of the build and deploy process.
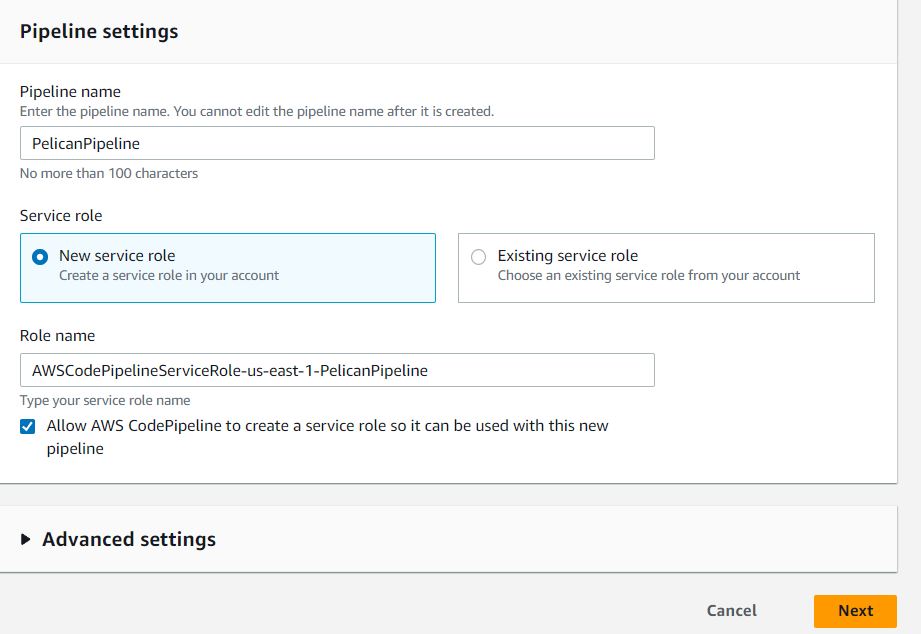
Let's start by creating our CodePipeline project. After entering the project name, keep other setting default for the Pipeline settings screen.
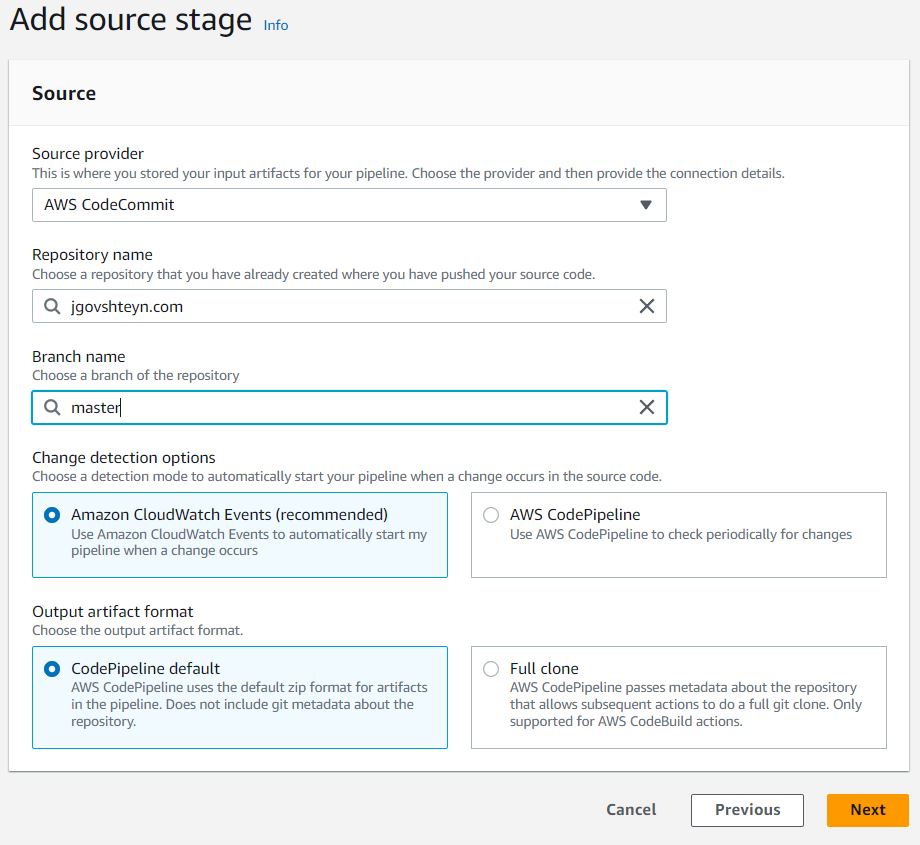
On the Source stage screen:
- select AWS CodeCommit
- select your Pelican repository under Repository name
- Choose master under Branch name
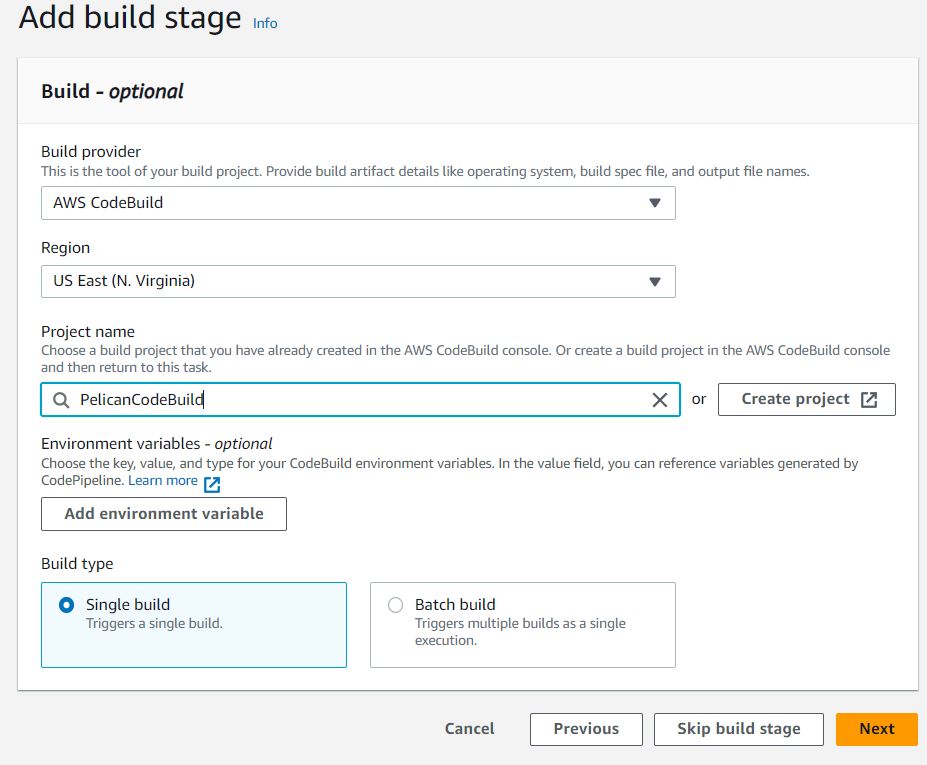
On the build stage screen:
- select AWS Codebuild under Build provider
- select the build project we created earlier Project name
Finally, On the Deploy stage screen:
- select Amazon S3 as the Deploy provider
- select the bucket name of our hosted static website under Bucket
- select Extract file before deploy
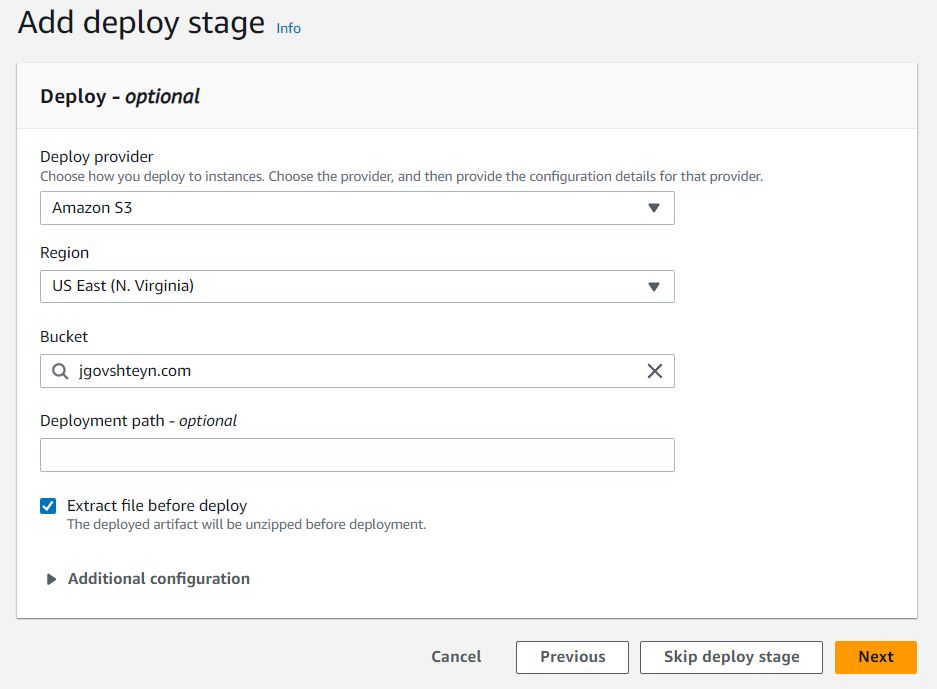
Keep all other options default.
Upload website content
After the stack is created successfully, I have a CodeCommit repository that I use as source control for the website’s content. To build and deploy our Pelican website
- Clone the repository to your local machine with
git clone <repository-url>. - Update the source of our website by adding a blog post inside the content directory according to Pelican specifications.
- Locally commit our changes by running
git add ., followed bygit commit -a -m "AWS hosted pelican site 1". - Upload the changes to the repository by running
git push -u origin master.
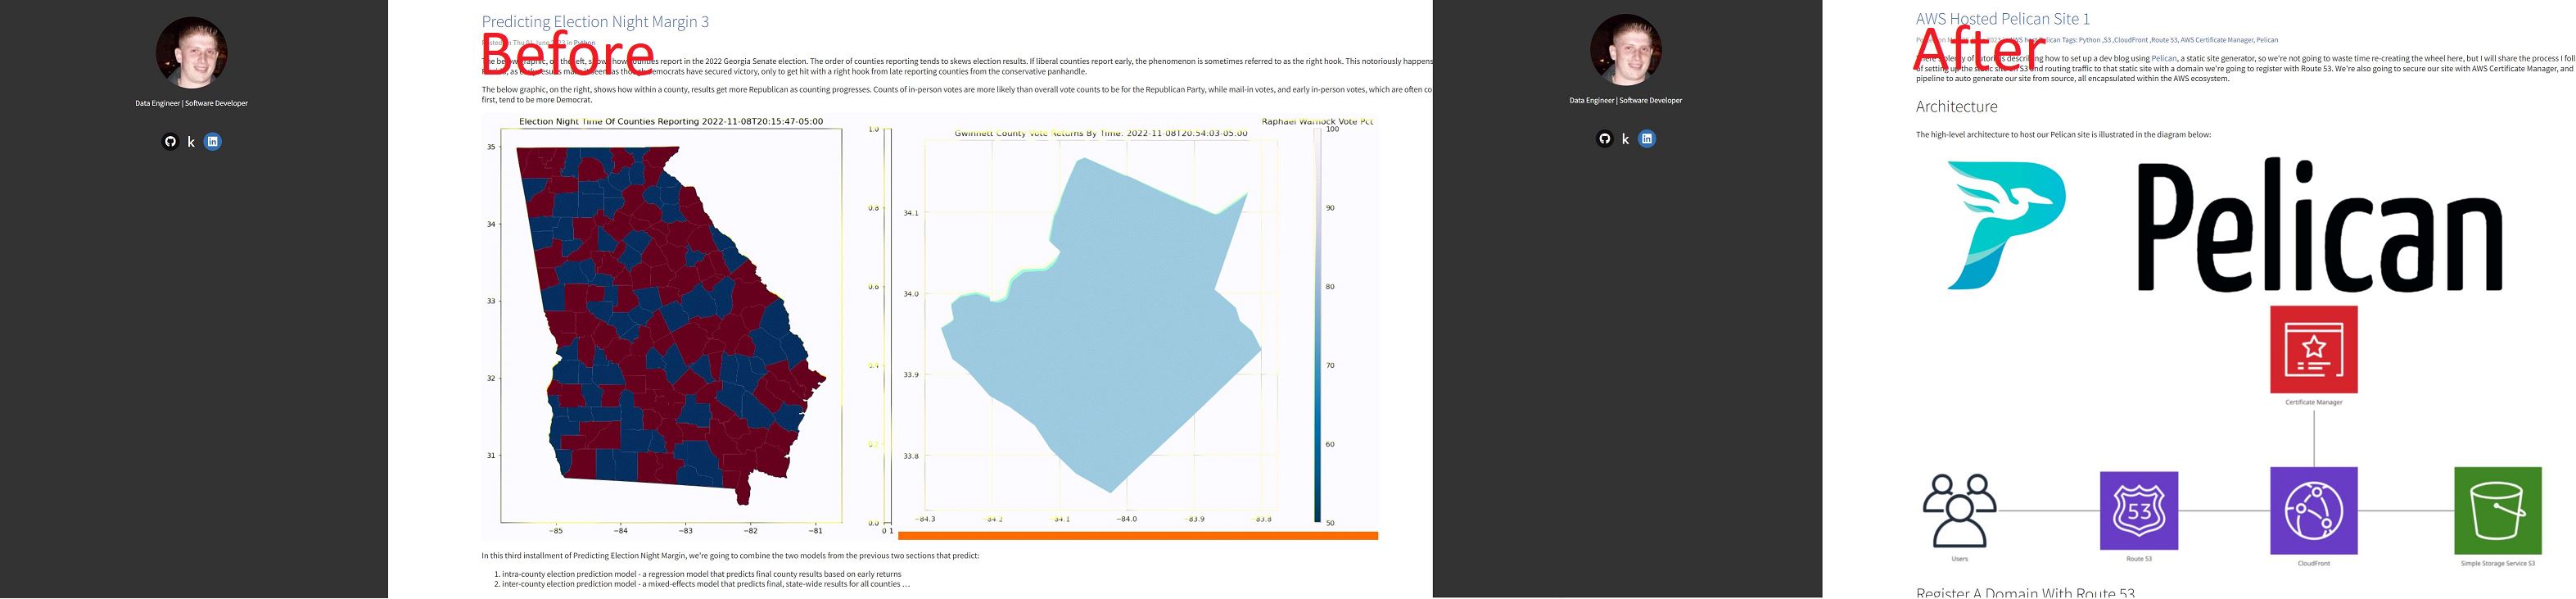
A git push triggers our CodePipeline workflow through the build and deploy process.
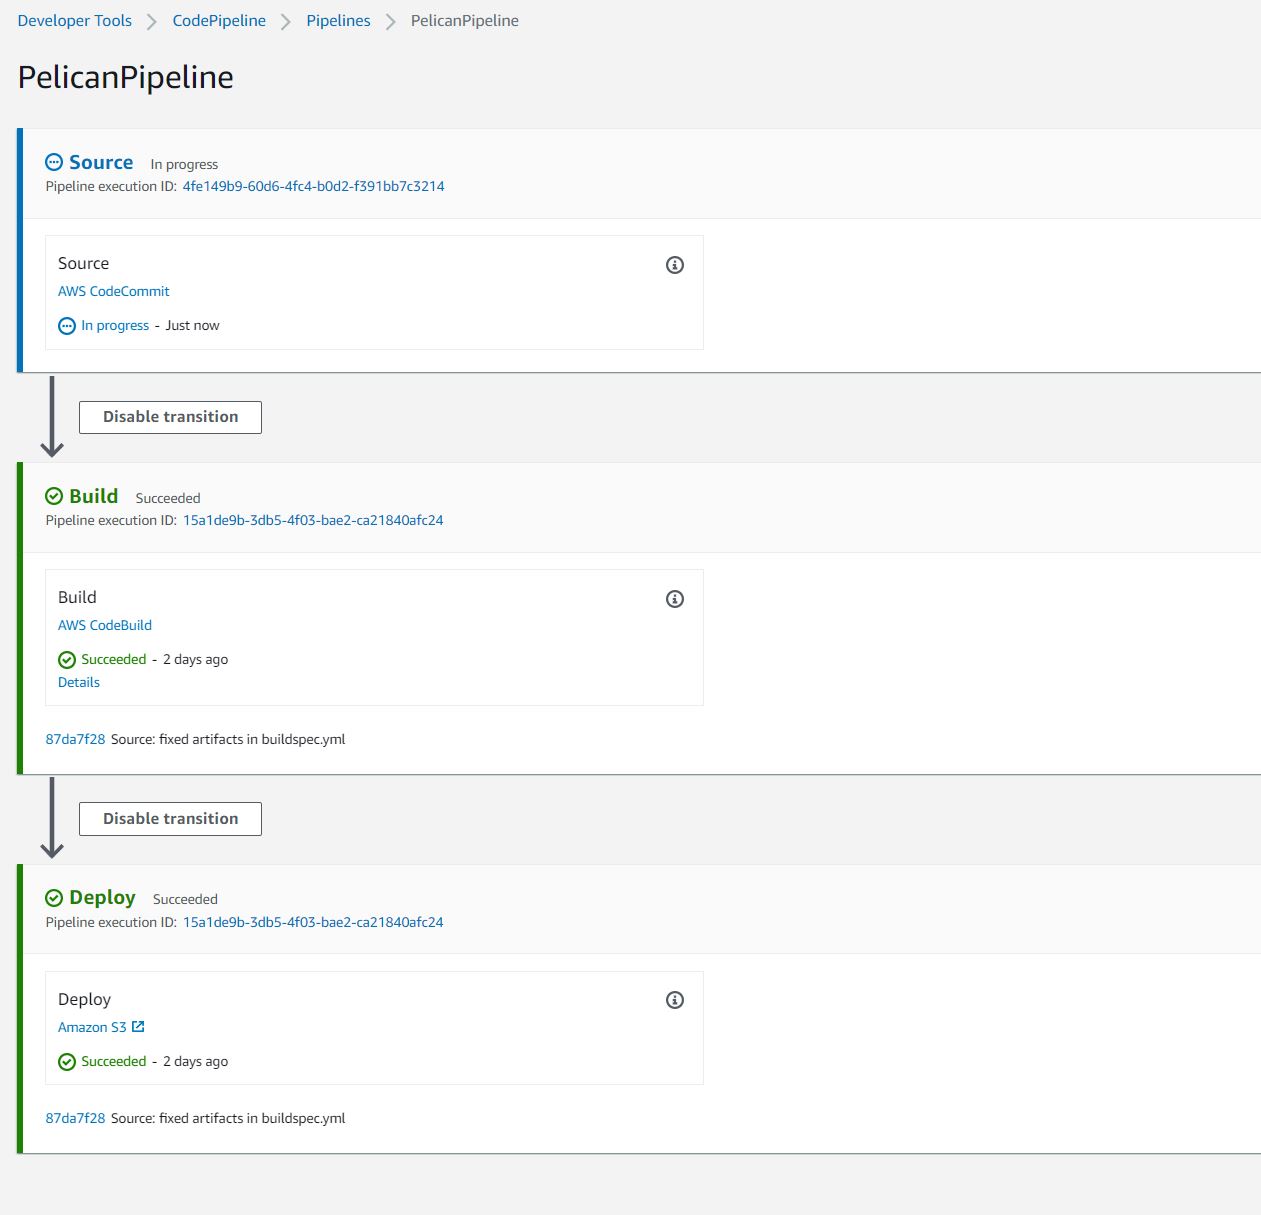
Once complete, our website goes live with our updates.
Conclusion
In this section we demonstrated how to set a complete CI/CD workflow through AWS CodePipeline, CodeBuild, and S3 to automate content publishing of a Pelican-based website.